> ## Documentation Index
> Fetch the complete documentation index at: https://klarity.ai/docs/llms.txt
> Use this file to discover all available pages before exploring further.
# How to add a user to your workspace
> Invite teammates to your Klarity workspace, assign roles, and resolve common errors.
export const NeedHelp = () =>
Need help? Use the in-app chat — click the chat bubble in the bottom-right corner of Klarity Architect (staffed 24×5) — or email support@klarity.ai.
;
## Overview
A new teammate needs access to your Klarity workspace, or an existing teammate needs to be added to a different workspace.
## Who can add users
Workspace admins can add users directly in the Klarity UI without filing a support ticket. If you are not a workspace admin, ask the admin on your team to invite you, or have them follow these steps.
## Steps to add a user
### Step 1: Access user management
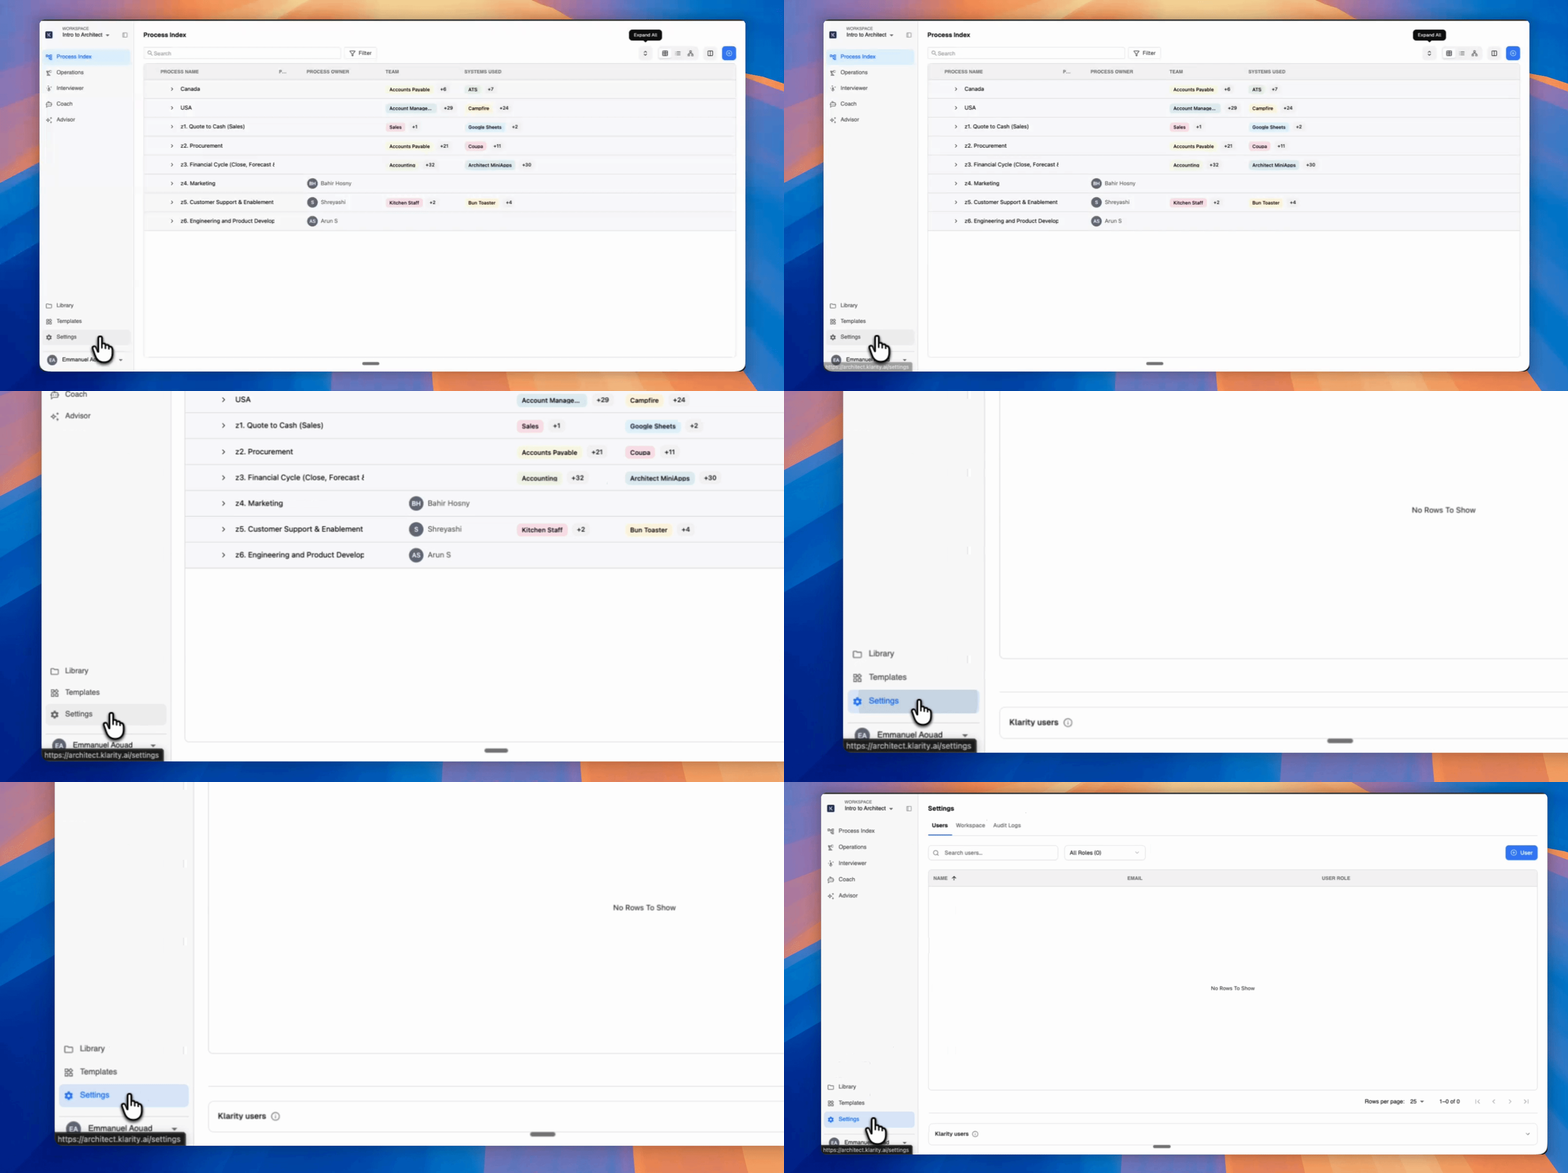
Navigate to your workspace settings and open **Workspace Settings** from the sidebar (gear icon).
### Step 2: Invite new user
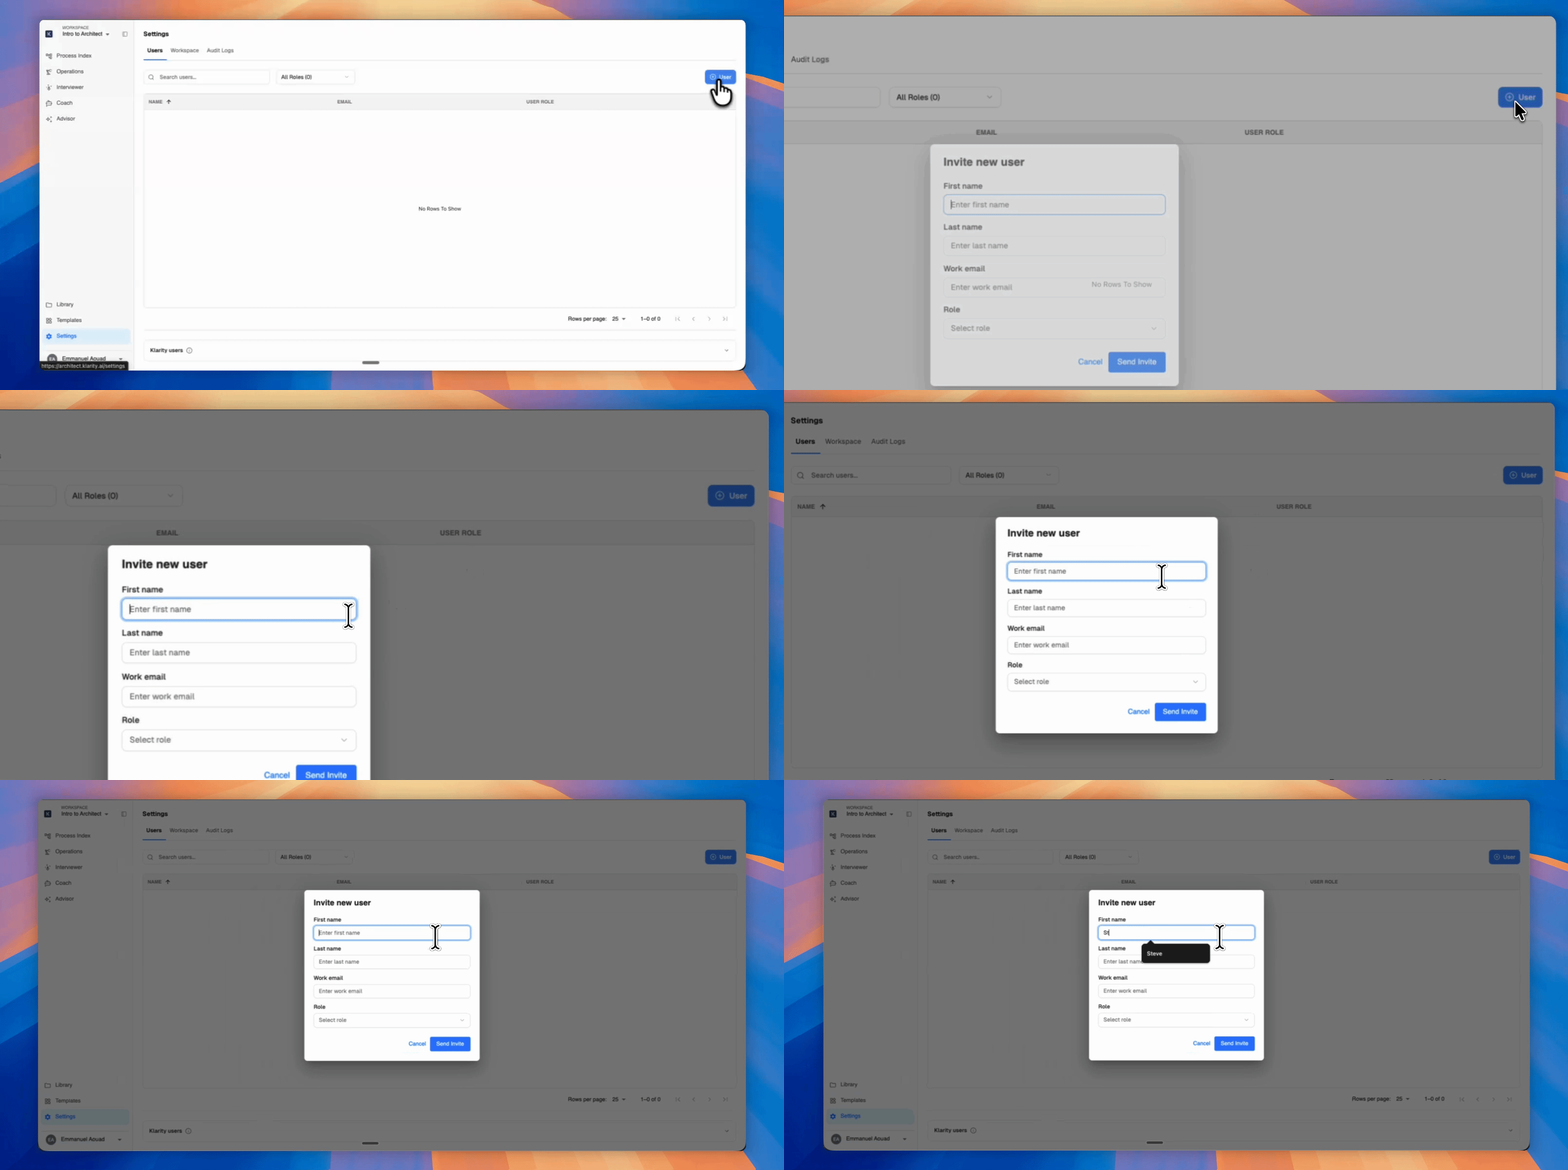
Click **Invite** or **Add User** and enter the new user's email address. If your organization uses single sign-on, make sure they are added to your company's internal SSO Klarity group. The email must be on a domain your workspace has approved. If the domain is new, see [If the new user has a different email domain](#if-the-new-user-has-a-different-email-domain) below.
 ### Step 3: Assign a role
Select the appropriate role for the new user based on their needs. See [User roles](#user-roles) below.
### Step 4: Send invitation
The user will receive an email invitation to join the workspace. If using Magic Link, they will need to authenticate in their email. If you are using Klarity's Okta, they will need to create an Okta account.
### Step 3: Assign a role
Select the appropriate role for the new user based on their needs. See [User roles](#user-roles) below.
### Step 4: Send invitation
The user will receive an email invitation to join the workspace. If using Magic Link, they will need to authenticate in their email. If you are using Klarity's Okta, they will need to create an Okta account.
 ## User roles
Can view processes and outputs in the Process Index. Cannot create or edit content. Ideal for stakeholders who need read-only access to process documentation.
A limited contributor role with no access to the Process Index — cannot browse, view, or edit it. Ideal when someone should contribute to Klarity without access to the broader process library.
Can create and edit process captures, run Analyst interviews and Companion sessions, and use Advisor for analysis. Cannot manage workspace settings or users. Ideal for process performers and analysts.
All Contributor permissions, plus adding and removing users, managing workspace settings, and customizing templates. Ideal for team leads managing their workspace.
All Workspace Admin permissions, plus managing multiple workspaces, organization-wide settings, and billing. Ideal for IT administrators and program leads.
## Best practices
* Start with the least privileged role needed.
* Review user access periodically.
* Use the Workspace Admin role sparingly.
* Ensure at least two Org Admins exist for backup access.
## Exceptions
### If the new user has a different email domain
If the user's email is on a domain your workspace doesn't recognize (for example, a contractor on an external domain), the admin must add the domain first:
1. Go to **Workspace Settings** → **Domains**.
2. Click **Add external domain**.
3. Enter the domain (e.g. `partner.com`) and confirm.
4. Return to the Users tab and add the user normally.
### Common errors
| Error | What it means | How to fix |
| ---------------------------------------- | ------------------------------------------------------------------------------------------- | -------------------------------------------------------------------------------------------------------- |
| **User not found** | The user has not been created in your identity provider yet (Okta, Google Workspace, etc.). | Ask your IT team to provision the user in your IdP first. |
| **Email domain not allowed** | The user's domain isn't approved for your workspace. | See [If the new user has a different email domain](#if-the-new-user-has-a-different-email-domain) above. |
| **Add user failed (backend constraint)** | Your workspace may have hit a seat limit. | Check your subscription, or contact support. |
## When to contact support
Contact support if:
* You are an admin and you see a backend error after following the steps above.
* You need to add 50+ users at once (mass user management).
* Your workspace seat limit needs to be increased.
**When you contact support, include:** your workspace name, the email of the user you tried to add, the role you tried to assign, and the exact error message.
## User roles
Can view processes and outputs in the Process Index. Cannot create or edit content. Ideal for stakeholders who need read-only access to process documentation.
A limited contributor role with no access to the Process Index — cannot browse, view, or edit it. Ideal when someone should contribute to Klarity without access to the broader process library.
Can create and edit process captures, run Analyst interviews and Companion sessions, and use Advisor for analysis. Cannot manage workspace settings or users. Ideal for process performers and analysts.
All Contributor permissions, plus adding and removing users, managing workspace settings, and customizing templates. Ideal for team leads managing their workspace.
All Workspace Admin permissions, plus managing multiple workspaces, organization-wide settings, and billing. Ideal for IT administrators and program leads.
## Best practices
* Start with the least privileged role needed.
* Review user access periodically.
* Use the Workspace Admin role sparingly.
* Ensure at least two Org Admins exist for backup access.
## Exceptions
### If the new user has a different email domain
If the user's email is on a domain your workspace doesn't recognize (for example, a contractor on an external domain), the admin must add the domain first:
1. Go to **Workspace Settings** → **Domains**.
2. Click **Add external domain**.
3. Enter the domain (e.g. `partner.com`) and confirm.
4. Return to the Users tab and add the user normally.
### Common errors
| Error | What it means | How to fix |
| ---------------------------------------- | ------------------------------------------------------------------------------------------- | -------------------------------------------------------------------------------------------------------- |
| **User not found** | The user has not been created in your identity provider yet (Okta, Google Workspace, etc.). | Ask your IT team to provision the user in your IdP first. |
| **Email domain not allowed** | The user's domain isn't approved for your workspace. | See [If the new user has a different email domain](#if-the-new-user-has-a-different-email-domain) above. |
| **Add user failed (backend constraint)** | Your workspace may have hit a seat limit. | Check your subscription, or contact support. |
## When to contact support
Contact support if:
* You are an admin and you see a backend error after following the steps above.
* You need to add 50+ users at once (mass user management).
* Your workspace seat limit needs to be increased.
**When you contact support, include:** your workspace name, the email of the user you tried to add, the role you tried to assign, and the exact error message.