> ## Documentation Index
> Fetch the complete documentation index at: https://klarity.ai/docs/llms.txt
> Use this file to discover all available pages before exploring further.
# Running your first Companion session
> Launch your first Klarity Companion session — from getting access to seeing your work show up in the Process Index.
export const NeedHelp = () =>
Need help? Use the in-app chat — click the chat bubble in the bottom-right corner of Klarity Architect (staffed 24×5) — or email support@klarity.ai.
;
This walks you through launching your very first Companion session — from getting access to seeing your work show up in the Process Index.
## 1. Get access and open Companion
Once your workspace admin has added you, log in to Klarity Architect at [app.klarity.ai](https://app.klarity.ai) using your company's sign-in method. From your home screen, open **Companion** (the side panel, or the chat bubble). If you need access, see [How to add a user to your workspace](/docs/user-docs/admin/add-a-user-to-your-workspace).
## 2. Set up your role profile
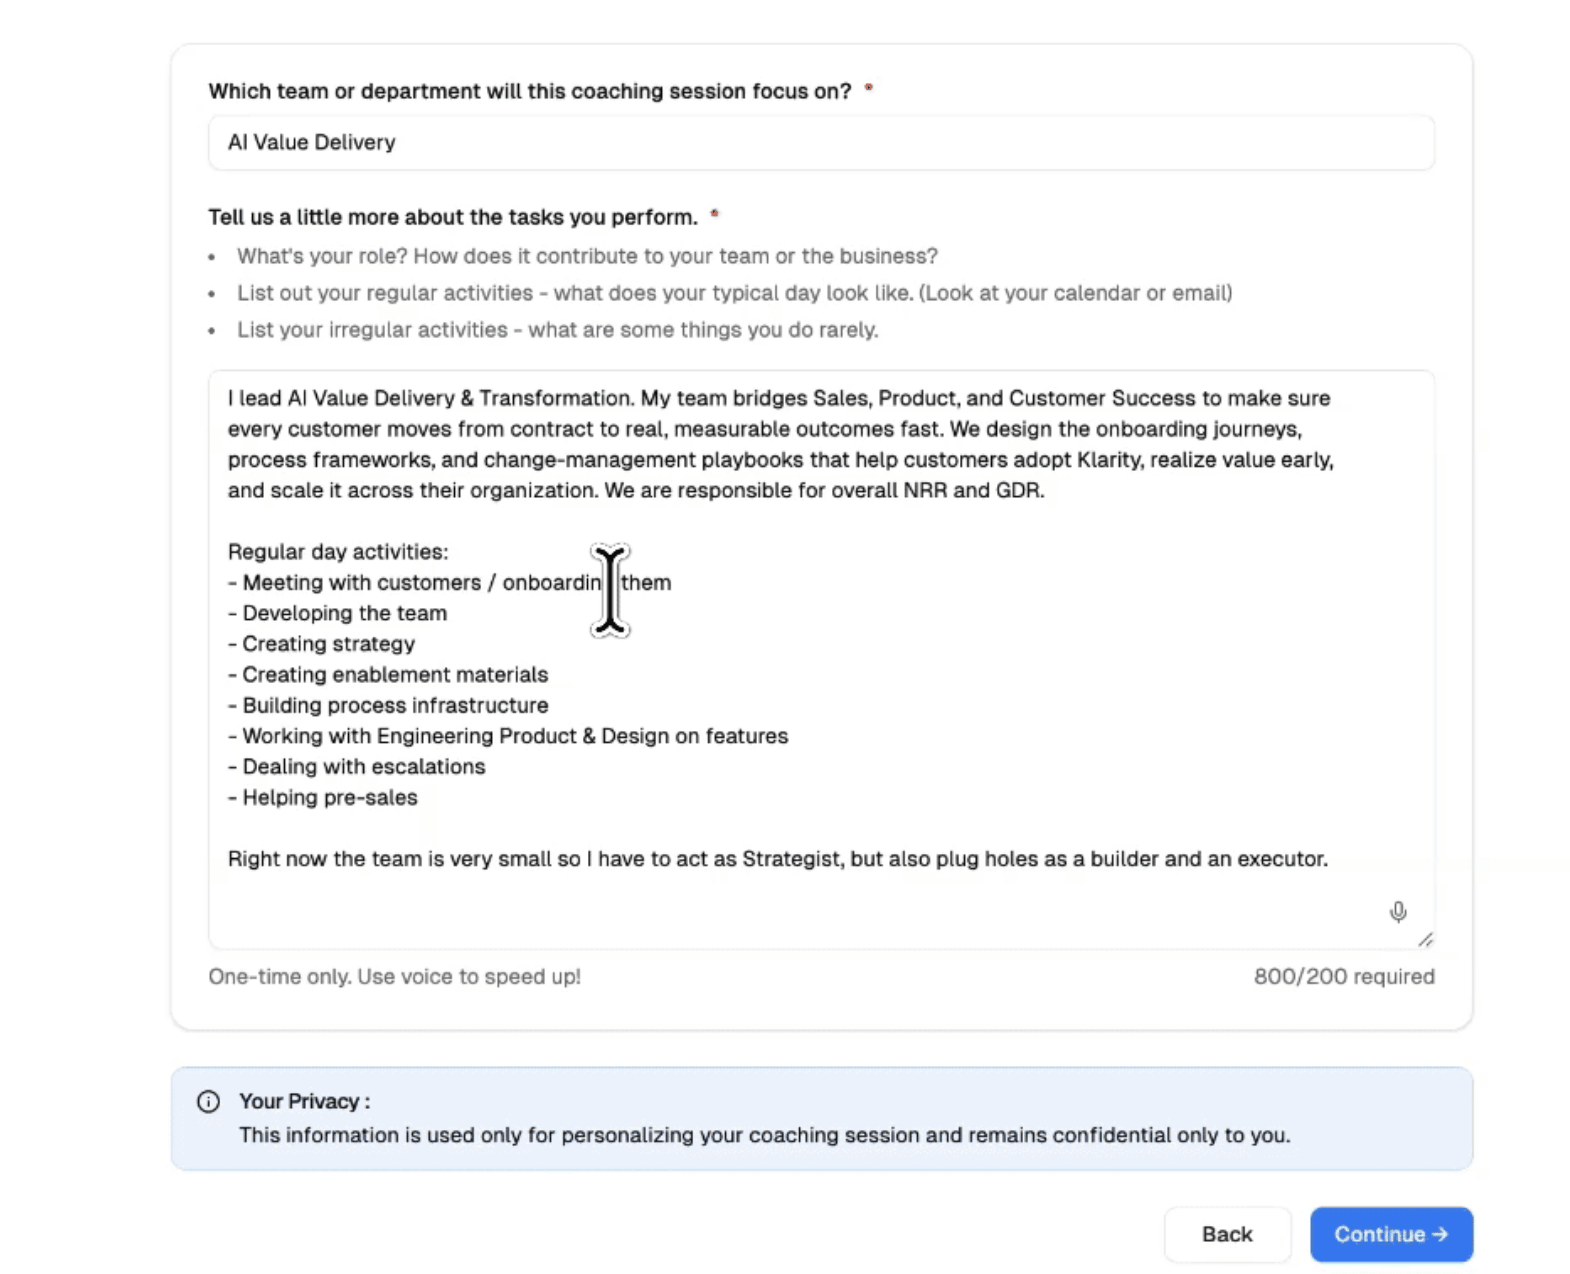
Before your first session, set up your **role profile** — this tells Companion what your work looks like so it can recognize your activities. Do this once.
* **If you're in an onboarding sprint:** the Klarity team usually designs your role profile for you and gives you a starting point. Confirm it looks right and adjust if needed.
* **If you're setting it up yourself:** use the voice-to-text option to describe your role out loud — what you do, the systems you use, the kinds of tasks you run — then fill in the rest from what you already know about your role. The more accurate this is, the better Companion's capture.
 ## 3. Start the session and share your screen
1. Click **Start session** and share your screen.
2. **Work as you normally would.** Companion observes quietly in the background and identifies the activities you perform — you don't need to do anything special or "perform" for it.
**Your privacy is protected.** No PII is captured in what's kept — screenshots are processed briefly and then permanently deleted, and only text-based outputs are retained. Companion also automatically omits anything that doesn't look like company work (personal browsing, sensitive content, off-topic activity). You can pause or end the session anytime.
**Run for at least an hour.** Companion captures best over a real stretch of work, and its insights (signals) build up over the course of a longer session rather than appearing in the first few minutes. A short session often produces little; an hour or more of normal work gives it enough to work with.
## 4. Review and submit at the end
When you end the session, you'll see what Companion captured:
* **Your activity timeline** — the work it identified, grouped into activities. Review it, and edit, recategorize, or exclude anything that isn't right.
* **Signals** — noteworthy observations (workarounds, friction) that surface through the session, concentrating toward the end. You choose which, if any, to share.
**Submit to the index.** If you want your session to actually build the process map, confirm and submit your activity timeline to the Process Index. This is the step that makes it count.
## 5. What happens after you submit
Submitting hands your session off to the indexing agent. It takes the clusters of work you did and figures out, for each one, whether it's a new **observation** of a process that already exists — or a **new process** it should create on your behalf. Your contribution shows up in the Process Index right away, no manual mapping required.
The more sessions you run, the richer the picture: repeated observations of the same process build a baseline and surface patterns over time.
## Where to go next
The full reference for all three capture methods.
See where your captured work lands and how to manage it.
## 3. Start the session and share your screen
1. Click **Start session** and share your screen.
2. **Work as you normally would.** Companion observes quietly in the background and identifies the activities you perform — you don't need to do anything special or "perform" for it.
**Your privacy is protected.** No PII is captured in what's kept — screenshots are processed briefly and then permanently deleted, and only text-based outputs are retained. Companion also automatically omits anything that doesn't look like company work (personal browsing, sensitive content, off-topic activity). You can pause or end the session anytime.
**Run for at least an hour.** Companion captures best over a real stretch of work, and its insights (signals) build up over the course of a longer session rather than appearing in the first few minutes. A short session often produces little; an hour or more of normal work gives it enough to work with.
## 4. Review and submit at the end
When you end the session, you'll see what Companion captured:
* **Your activity timeline** — the work it identified, grouped into activities. Review it, and edit, recategorize, or exclude anything that isn't right.
* **Signals** — noteworthy observations (workarounds, friction) that surface through the session, concentrating toward the end. You choose which, if any, to share.
**Submit to the index.** If you want your session to actually build the process map, confirm and submit your activity timeline to the Process Index. This is the step that makes it count.
## 5. What happens after you submit
Submitting hands your session off to the indexing agent. It takes the clusters of work you did and figures out, for each one, whether it's a new **observation** of a process that already exists — or a **new process** it should create on your behalf. Your contribution shows up in the Process Index right away, no manual mapping required.
The more sessions you run, the richer the picture: repeated observations of the same process build a baseline and surface patterns over time.
## Where to go next
The full reference for all three capture methods.
See where your captured work lands and how to manage it.